Truck Bed Repainting: How to Turn an Old Truck Bed New
Updated: February 14, 2022Drivers increasingly expect our cars and trucks to last a long time. The average age of a vehicle today is about 11 years, with many older classic and vintage vehicles still making their way reliably down the road. At some point, though, an aging vehicle may require restorations, including a repainting job.
If you plan to restore an old truck bed and you want to remove the old paint and layers of grime, you may find hand-sanding takes a lot of time and effort. With manual sanding, it’s also tricky to get paint out of corners and crevices — you may not be able to get full access to them, no matter how hard you try.
Abrasive blasting is an ideal solution. It removes paint and encrusted dirt from your truck bed, so you can get on with the painting work to get your truck looking as good as new. The guide below will explain the process in more detail and discuss how to paint a truck after abrasive blasting.
Preparing Your Truck Bed for Repainting
To prepare your truck bed for repainting, you’ll need to start by refinishing the metal, potentially with abrasive blasting.
What is abrasive blasting? This process resurfaces metal by using compressed air to scour it with rough material, often tiny grains like sand, steel shot or plastic. Abrasive blasting may use many different materials, depending on the metal and finish you’d like.
How can you use abrasive blasting to prepare a truck bed for repainting? At Finishing Systems, we can use abrasive blasting to get your metal truck ready for a spruce-up job, no matter the size or shape of its bed.
Painting requires a relatively smooth, clean surface, but older metal truck beds tend to be rough and dirty. An old truck bed likely has an aging, peeling layer of paint, and the years may have pasted on some thick layers of dust and grime as well. You’ll need to strip off the old layers before applying a fresh, clean coat of paint.
That’s where abrasive blasting comes in. The tough abrasives we use in our processes can have those rough, unsightly layers off your old truck bed in no time. Our materials include the following.
- Sandblasting media
- Glass beads
- Steel shot and grit
- Aluminum oxide
- Silicon carbide
- BLACK BEAUTY®
- Plastics
- Starblast™
- Corncobs
- Walnut shells
And how does Finishing Systems prepare a truck bed for abrasive blasting? Here are a few of the steps we take.
- Analysis: First, we examine the truck bed to ensure it’s an ideal candidate for abrasive blasting. A bed with minimal corrosion that primarily needs stubborn dirt and paint layers scraped off will likely see excellent results. If the bed has extensive corrosion, we can still apply abrasive blasting to it, but it will probably need to have new parts welded in to replace the damaged areas.
- Metal assessment: We then assess the metal’s condition to determine what type of abrasive will work best. If the material is too harsh for the metal, it can warp the bed or blast a hole in it. Or, if it’s not abrasive enough, it will do a poor job or cause the process to take much longer than it should. The professional you work with can help select the best media for your particular truck metal and configuration.
- Blast cabinet preparation: Finally, we get the abrasive blast cabinet ready to scour the unwanted materials from the truck panels.

How to Paint a Truck Bed
How does the truck bed repainting process work? We’ll walk you through the steps below.
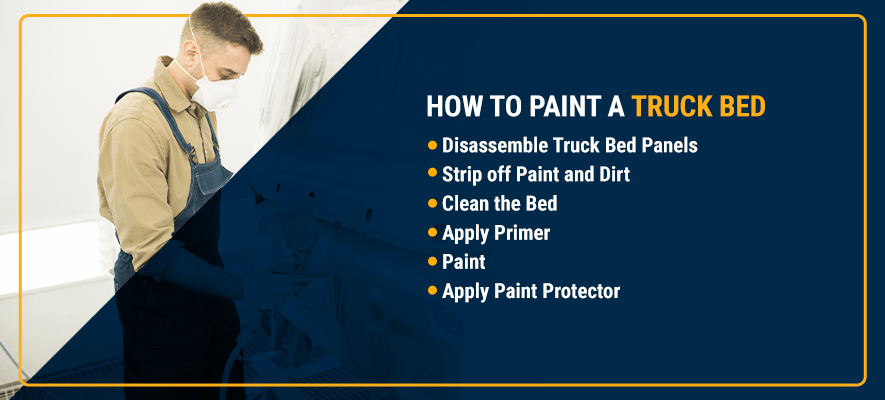
1. Disassemble Truck Bed Panels
The first step is to take your truck bed apart, if possible. Detachable panels will fit into the blasting cabinet, but an intact truck bed will not. If you can’t disassemble your panels, you’ll need to use a handheld blaster instead of a cabinet.
2. Strip off Paint and Dirt
The next step is to use abrasive blasting to remove old paint, dirt and debris from the truck bed. Using pressurized air, a nozzle and a protective blast cabinet, the operator will distribute the chosen medium across the bed at a high velocity for the optimal abrasive effect.
It’s critical to move thoroughly and swiftly over the truck bed at this stage. Blasting an area with abrasives for too long can cause that spot to warp, crack or develop holes. It’s also essential to apply the abrasives thoroughly to ensure a clean, even finish. Fortunately, our technicians have extensive experience and practiced eyes, so they can remove the necessary paint and debris and leave a sturdy, clean metal surface that’s ready for painting.
3. Clean the Bed
After abrasive blasting, the truck bed may contain tiny pieces of abrasive. You’ll want to sweep or vacuum to clear out any larger debris. A quick wash can then remove any leftover pieces to ensure they don’t interfere with the paint application.
4. Apply Primer
In some cases, you may need to apply a primer or adhesion promoter, so your paint will stick properly to the metal. Check the paint you plan to use to see what the manufacturer recommends.
5. Paint
After abrasive blasting and ensuring the bed is clean and free of debris, it’s time for truck bed painting. Be sure to use masking tape to cover any parts you don’t want to apply paint to. You might want to remove the tailgate for easier access if you didn’t do so for the blasting process. You’ll also want to work outdoors or in a well-ventilated area for safety.
If you’re wondering how to paint the inside of a truck bed, the process is relatively straightforward. Start painting by using a brush to apply paint to the bed rails, corners and any other areas that present a challenge to reach. Then, apply a single coat of paint to the bed’s sides and flat surfaces. You can use a brush roller for this step, being sure to cover the metal thoroughly. Wait about 20 minutes, then apply a second coat to ensure full, uniform coverage. You can continue adding coats to enhance the paint’s thickness or appearance if you wish.
Once you finish painting, take off the tape, reinstall the tailgate and give the freshly painted truck bed about a day to dry.
6. Apply Paint Protector
If you would like, apply a paint protector to the truck bed. A paint protector helps the paint job last longer by guarding against minor nicks, scratches and sun damage.
Work With Finishing Systems for Quality Truck Bed Restoration
To remove paint, dirt and debris from your truck quickly before repainting, contact Finishing Systems. Our services for preparing a truck bed for repainting use advanced blasting media, so you can get started on restoring your truck bed to an eye-catching color and shine. We offer an extensive catalog of abrasives and can help you choose the perfect medium for restoring your truck’s metal quickly and safely.
The cost of truck bed painting and resurfacing varies. Talk to one of our experienced professionals to learn more about what your unique truck bed would require.
Contact us today to schedule refinishing services or get more information.

